Author : Lisa Agius-Gilibert
Lisa is a Sydney-based Equine Podiotherapist with a Bachelor of Equine Science, trimming professionally since 2007. At Flex Hoof Boots, she creates evidence-based educational content to help horse owners feel confident in hoof care and boot fitting – empowering them to give their horses the best possible lives.
At Flex Hoof Boots, our mission is to empower dedicated horse owners with evidence-based knowledge to give their horses the lives they truly deserve. One of the simplest yet most powerful ways to do that? Weekly toe trims.
Yes, that’s right. Just a quick weekly touch-up to your horse’s toe can:
- Help your horse move more comfortably
- Maintain healthier hooves long term
- Prevent excessive flare or distortion
- And extend the life and performance of your Flex Hoof Boots
Let’s walk you through exactly how and why to do it safely and effectively.
Why Weekly Trimming Works
In nature, horses would wear their hooves down gradually as they moved over varied terrain. Domesticated horses? Not so much. Even with regular trimming cycles, a lot can happen between appointments (especially at the toe), where excess growth can:
- Delay breakover
- Strain the limb
- Cause boots to twist or pop off
- Cause excessive wear in the boot
That’s where weekly maintenance trims come in.
Step 1: Understand the Sole Anatomy

Think of the bottom of the hoof like a clock:
- Toe = between 10 o’clock and 2 o’clock
- Quarters = 8–10 and 2–4
- Heels = 5 o’clock and 7 o’clock

The frog, bars, and heel bulbs form the back of the foot. These landmarks help you find the breakover point. This is where the toe should roll over during movement.
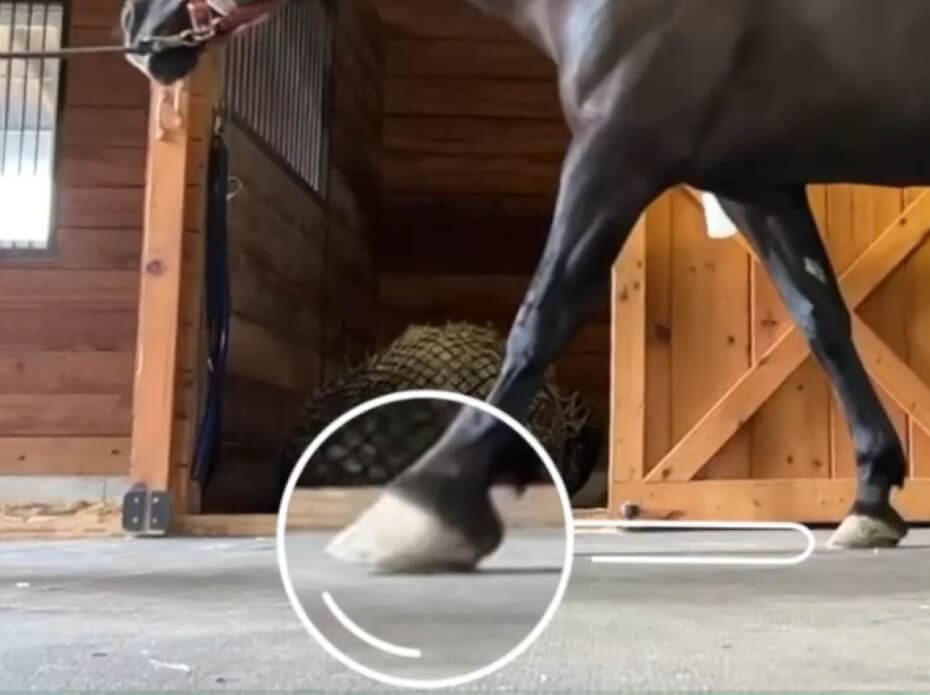
Step 2: Find the Breakover Point
To safely trim, you need to identify the breakover point – the last spot where the hoof leaves the ground during movement.
To map breakover, we first need to find two landmarks on the sole:
- The back of the foot – This is where the central sulcus ends and the frog meets the sole.
- The centre of the foot. You can find this by:
- Looking for the end of the laminar line in the bars
- Finding the widest part of the sole
- Feeling for the bar swells in the collateral grooves (which correspond with bony landmarks on the pedal bone)
- Looking for the end of the laminar line in the bars
Once you’ve found the centre, measure that same distance forward to the toe. This gives you your ideal breakover line.
Step 3: Understand Hoof Wall Structure
Before you start trimming, it’s important to know what you’re looking at:
- Outer wall (pigmented)
- Inner wall (bright white)
- Laminar line (creamy or yellow)
- Sole

When placing your toe bevel, it should begin where the sole and laminar line meet. This is the natural edge of the weight-bearing surface.

Step 4: Apply a Safe Bevel
The goal of weekly rasping is simple: keep the toe short and bevelled.
Even if you’re just using a rasp (no nippers needed), you can make a huge difference. Here’s how:
- Place your rasp at a 45-degree angle to the plane of the sole
- Begin rasping from the junction of the laminar line and sole
- Smoothly remove a small amount of the outer and inner hoof wall in the toe area. Gently remove the outer wall (pigmented) and inner wall (white line area) until you’ve smoothed in a bevel.
- Focus more at the toe and quarters, less at the heels.
- From the top, use the file side of your rasp to round off sharp edges.
This mimics what natural wear would do, and it protects against the kind of growth that delays breakover and causes boots to fit poorly. You’re not reshaping the hoof – you’re just maintaining the work your hoof care provider has already done.
Step 5: Know What to Preserve
A common mistake is taking off too much. The green “toe callus” and purple “toe and heel platforms” are dense, protective structures. They support the tip of the pedal bone, keep your horse comfortable and sound. The platforms and callus can be used to allow you to back the toe up without making your horse sore.
Always preserve these platforms and focus only on refreshing the bevel.
Don’t rasp away everything!
- Preserve the toe callus! This is the dense area of sole that protects internal structures like the tip of the pedal bone
- Preserve the toe platform and heel platform unless advised by a hoof care professional
- Focus on the bevel, not a flat plane across the toe

Why This Matters for Boot Fit
When the toe gets long between trims, breakover is delayed, and boots can:
- Rub the hoof
- Shift on the hoof
- Get excessive wear in the toe or heels, or even break
- Not sit flush with the hoof
Weekly beveling keeps the hoof shape in sync with the Flex Boot design (and more importantly, your horse’s natural biomechanics!), leading to better performance and comfort for your horse.
Final Tips for Success
- Make it a weekly habit: do it every 7 days to stay on top of growth.
- If you’re unsure, ask your hoof care professional to mark your horse’s breakover line for reference.
- If you aren’t confident, use the fine side of the rasp and go slow. You can always take more hoof material off, but you can’t put it back on!
- Don’t touch the sole or frog unless trained and confident. Begin your bevel at the laminar line in the toe if you are not sure.
This is about simple maintenance, not full trims!
Ready to Learn More?
At Flex, we believe education is the key to better hoof health. Check out our Hoof to Horse Academy or connect with our community of passionate, evidence-based horse owners over on Facebook, here.
Together, we’re helping horses move better – one weekly touch up trim at a time.